
When I first visited Slovenia more than 13 years ago, I was immediately enamoured with the liberal use of wood as a building material.
Once outside of the cities, I saw a lot of traditional-style houses, barns and kozolec (hayracks) made from wood. Wooden roof shingles are still quite common (although not as prevalent as they were 50+ years ago) and many of these traditional-style houses have wooden rain gutters.

Breg House itself had wooden gutters when I first bought it but they were at the end of their lives, and with interior renovations the priority, the house had remained gutter-less for over a decade. Which was probably not a good thing. Slovenia gets plenty of rain (which is what keeps it so lush and green) and there is some damp present in some of the old stone walls.
It was always my intention to replace the wooden gutters. I had planned to do that at the same time I replaced the roof (which was also originally a wooden shingle roof).
However, the sudden gift of time due to the coronavirus lockdown gave me an idea. Could I make and install wooden gutters myself? Afterall, I had seen plenty of them and it couldn’t be that hard – right?
It was to be a learning curve. Despite numerous searches, I was surprised that I could not find any information online about making traditional wooden gutters from tree trunks. So I had to make it up as I went along, modelling my designs on gutters from a nearby building.
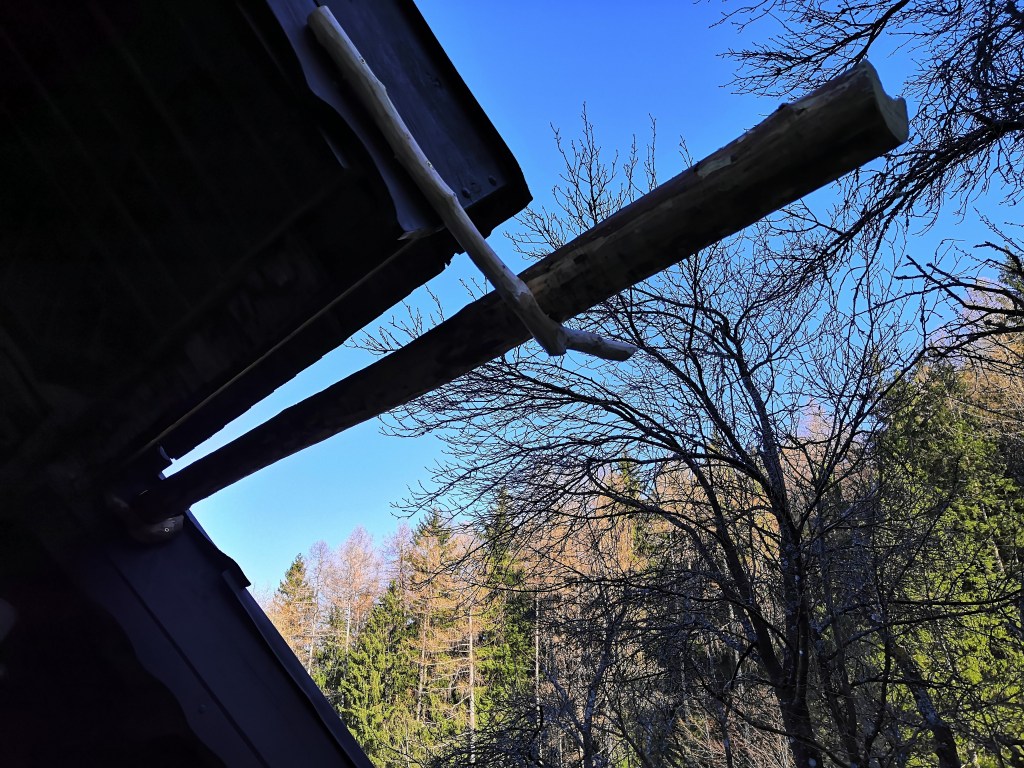
The are just two parts to the traditional wooden gutter design; the gutter itself and the brackets that attach the gutter to the roof, normally at the rafters. The gutters are fashioned from single, straight tree trunk, with a ‘V’ or ‘U’ shaped channel carved out from the middle. Impressively, the brackets are also made from pieces of wood; branches that have been selected specifically for their curved shape which cradles the gutter and holds it in place.
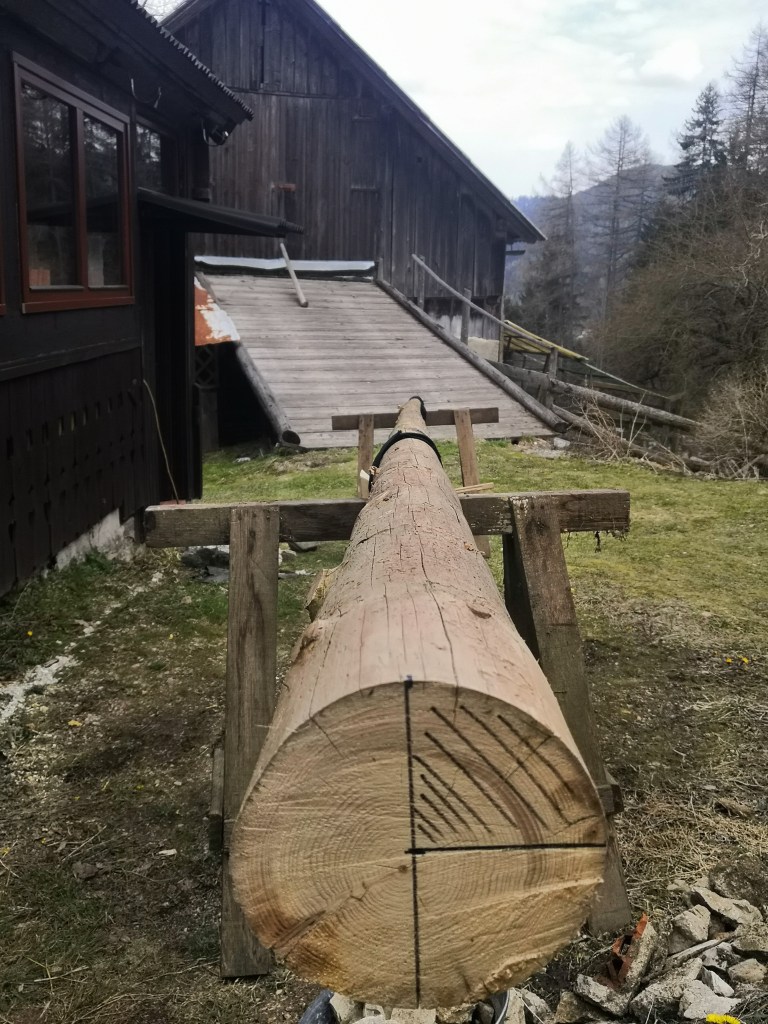
Fortunately I already had some suitable lengths of trunk. I was unsure as to the exact species, but some type of conifer. There are certain types of wood that will last seven or so years, and some that will last many more. Mine is likely the former, but ever since I started renovating this place, my Breg ethos has been to reuse, recycle, upcycle or repurpose materials already present, rather than buying new, wherever possible.
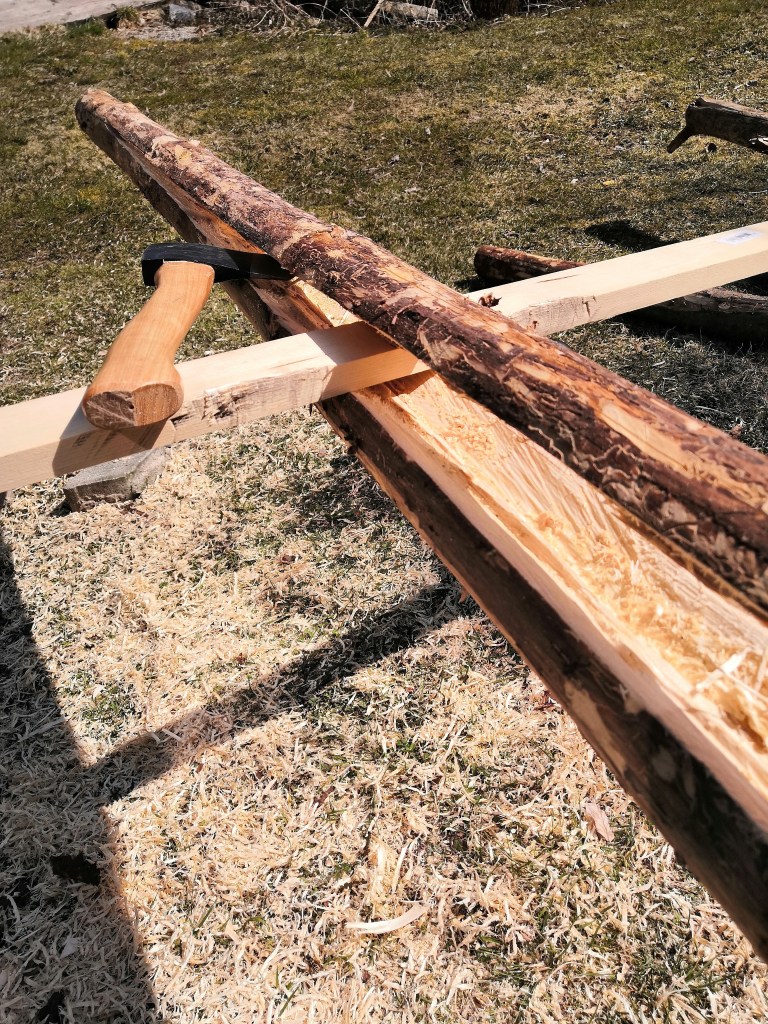
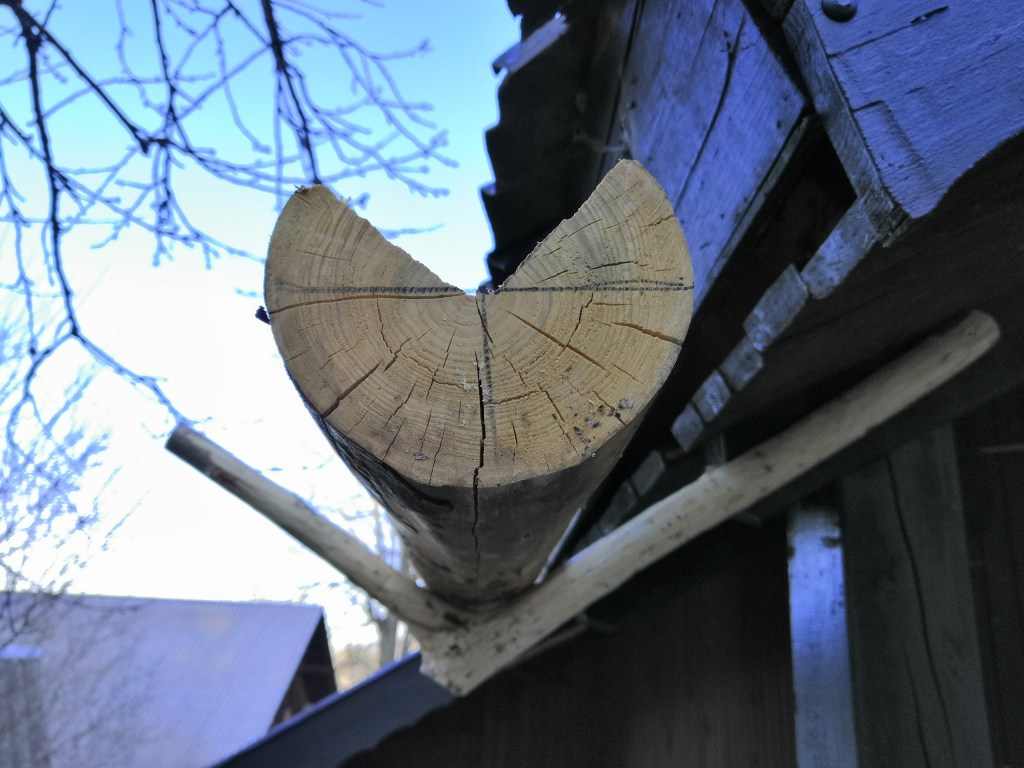
My first job was to remove the remaining branches, nodules and bark from the trunk which I did with an axe. Then I secured the trunk down and did some rough measuring and marking. I aimed to remove a 90 degree section of the trunk, leaving behind a V shaped channel.
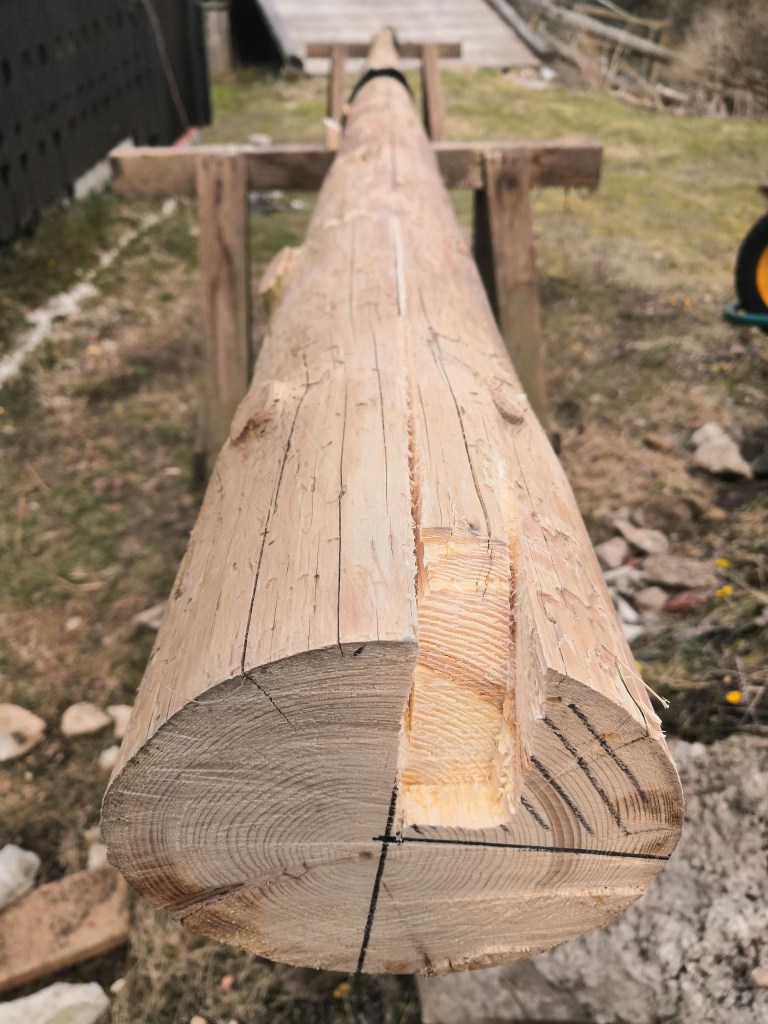
I contemplated several different methods for this. I began by using a hand saw and chisels, cutting vertical lines into the round of the trunk, then chiselling out the waste. Whilst it was satisfying to make wood chips fly, it was slow going, and with some 20 metres of gutters to make, I decided to break out the chainsaw on the second day.
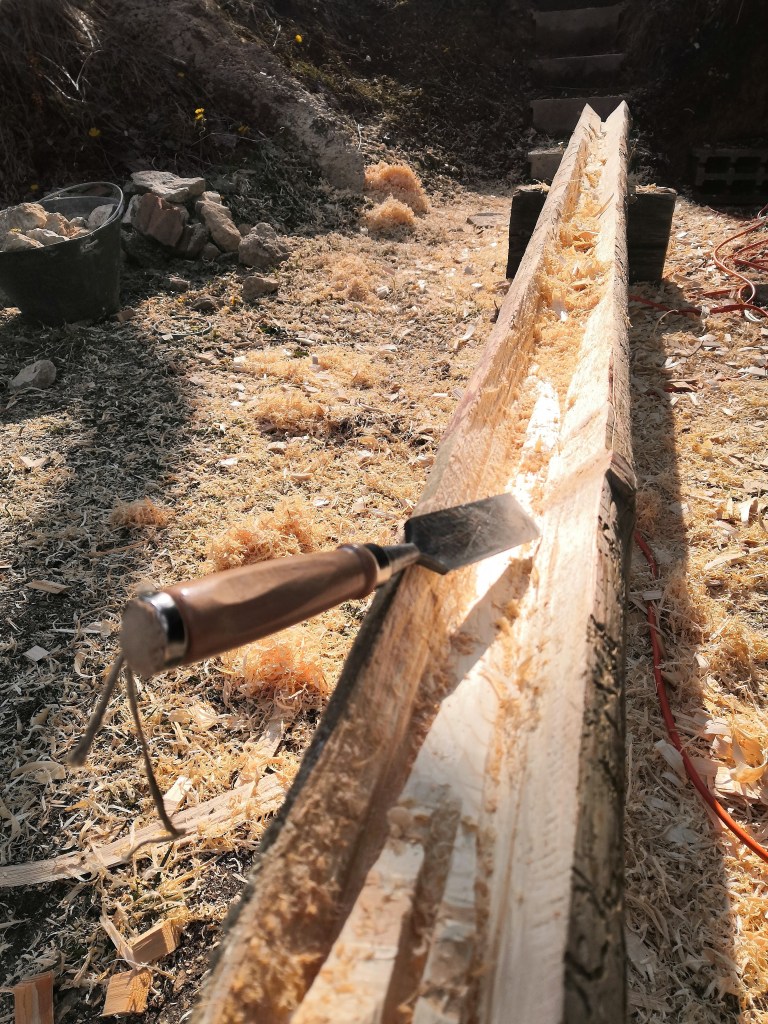
I spent that day using the chainsaw to cut the lines, and the chisels to remove the waste. This was much faster than with the hand saw, but still quite labour intensive. By the end of the second day, my hand was blistered from pounding my chisel with my makeshift mallet (a round log off the wood pile; the Breg ethos strikes again).
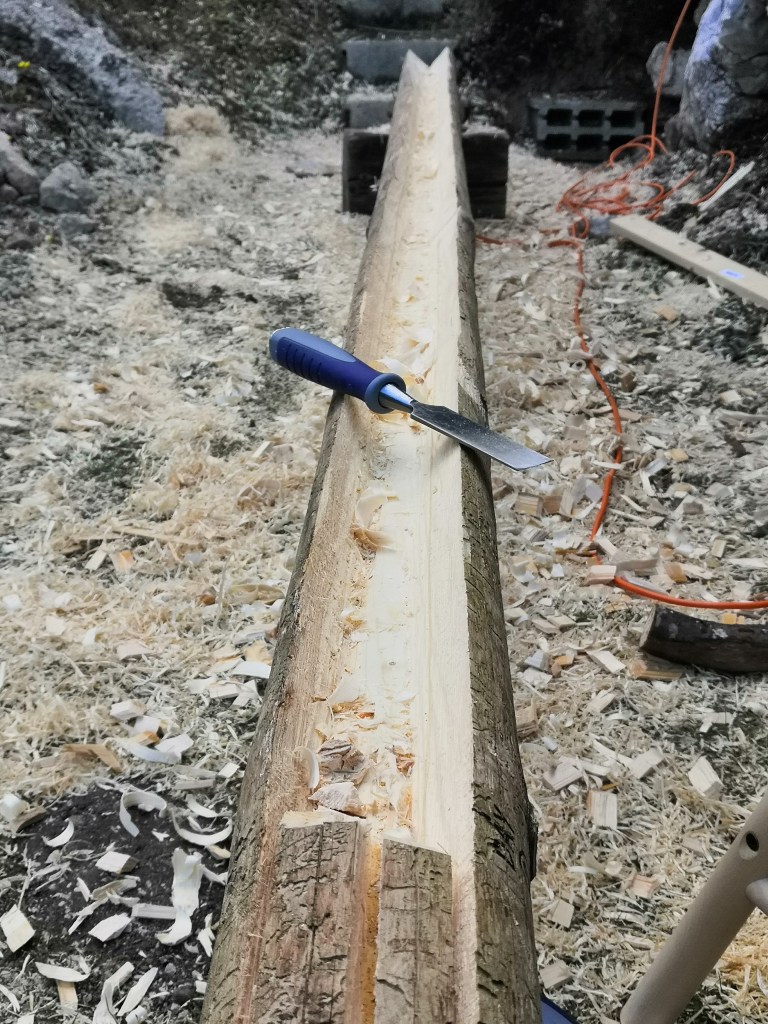
By the third day, I decided to remove the bulk of the waste wood with the chainsaw alone. I was feeling confident enough with the saw that it wouldn’t pose too great a risk in these coronavirus times, and I used the bottom and the tip to slowly edge a line up the trunk. I’d then rotate it by 90 degrees and do the same again. This method allowed me to slowly cut out one continuous segment of wood, that ran the whole length of the trunk.

This still took me some hours to do. I had to keep checking my cuts to see where I needed to go deeper, and keep rotating the trunk. A more skilled chainsaw operator could have likely done the job in minutes, but I took my time, and it was still much faster than relying on chisels alone.
Once the wedge came out (assisted by my favourite axe) I then widened and deepened the channel as the trunks were not completely straight, (and neither were my chainsaw cuts).
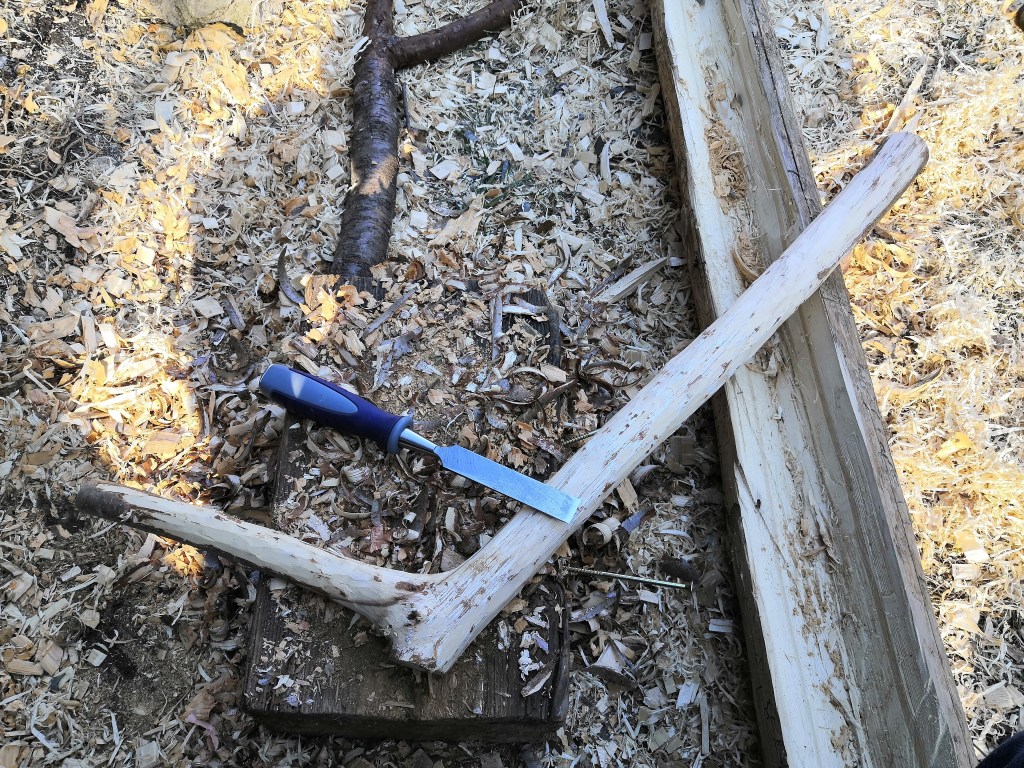
To make the brackets to support the gutters, I searched for and selected branches of the right shape and size. This part was quite expiermental, and my first mistake was to make brackets that turned out to be too short. Due to the position of the rafters in relation to the roof, I required brackets with long, straight shanks.
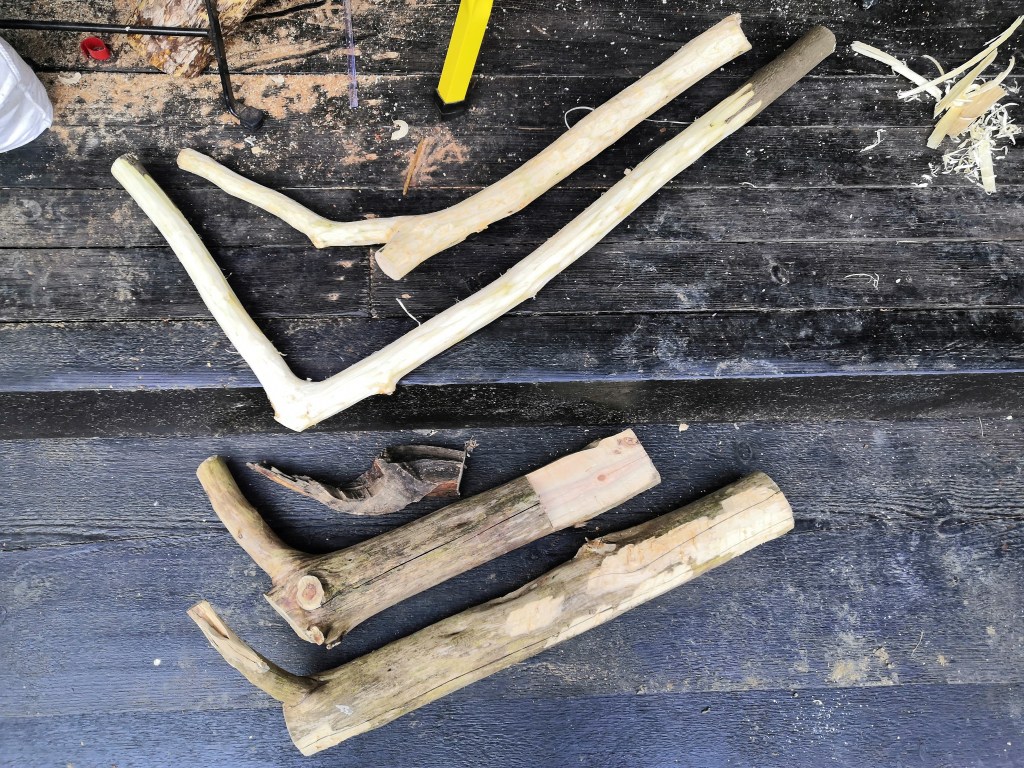
Eventually, I found and shaped suitable pieces. The final stage was erecting the brackets, ensuring the gutters lay as close to the roof edge as possible and created enough fall to channel the water down the gutter. It turned out to be a particularly arduous job getting the brackets in the right place, in part because I had to hacksaw through the old metal brackets to remove them, whilst up a ladder, in a very arkward position, with a tiny hacksaw.
After days of chiselling, chainsawing and struggling with bracket positions, I finally got the gutters up. Over the course of the project, I became completely immersed in their making. I was totally focussed on them, and spent almost all the daylight hours toiling over their construction.
It was hard work, and it did make me realise why metal and plastic guttering are now the norm. And I have only made half of the gutters required, so there are days more work to come if I want to complete the task.

They are certainly not pieces of precision work. Due to the fact that the current roof has been laid down on top of the old wooden roof adding additional height, I was unable to get the gutters as close to the roof edges as I would like. They are rough and basic like much of Breg house. But I hope the original creators of Breg who, some 300 years ago, simply used whatever they had to hand to get the job done, would appeciate the effort. And they are up, they do seem to catch most of the water I poured on as a test, and I do like the look of them.
I now await the next rainy day, when I’ll observe them in situ and make any further adjustments required.
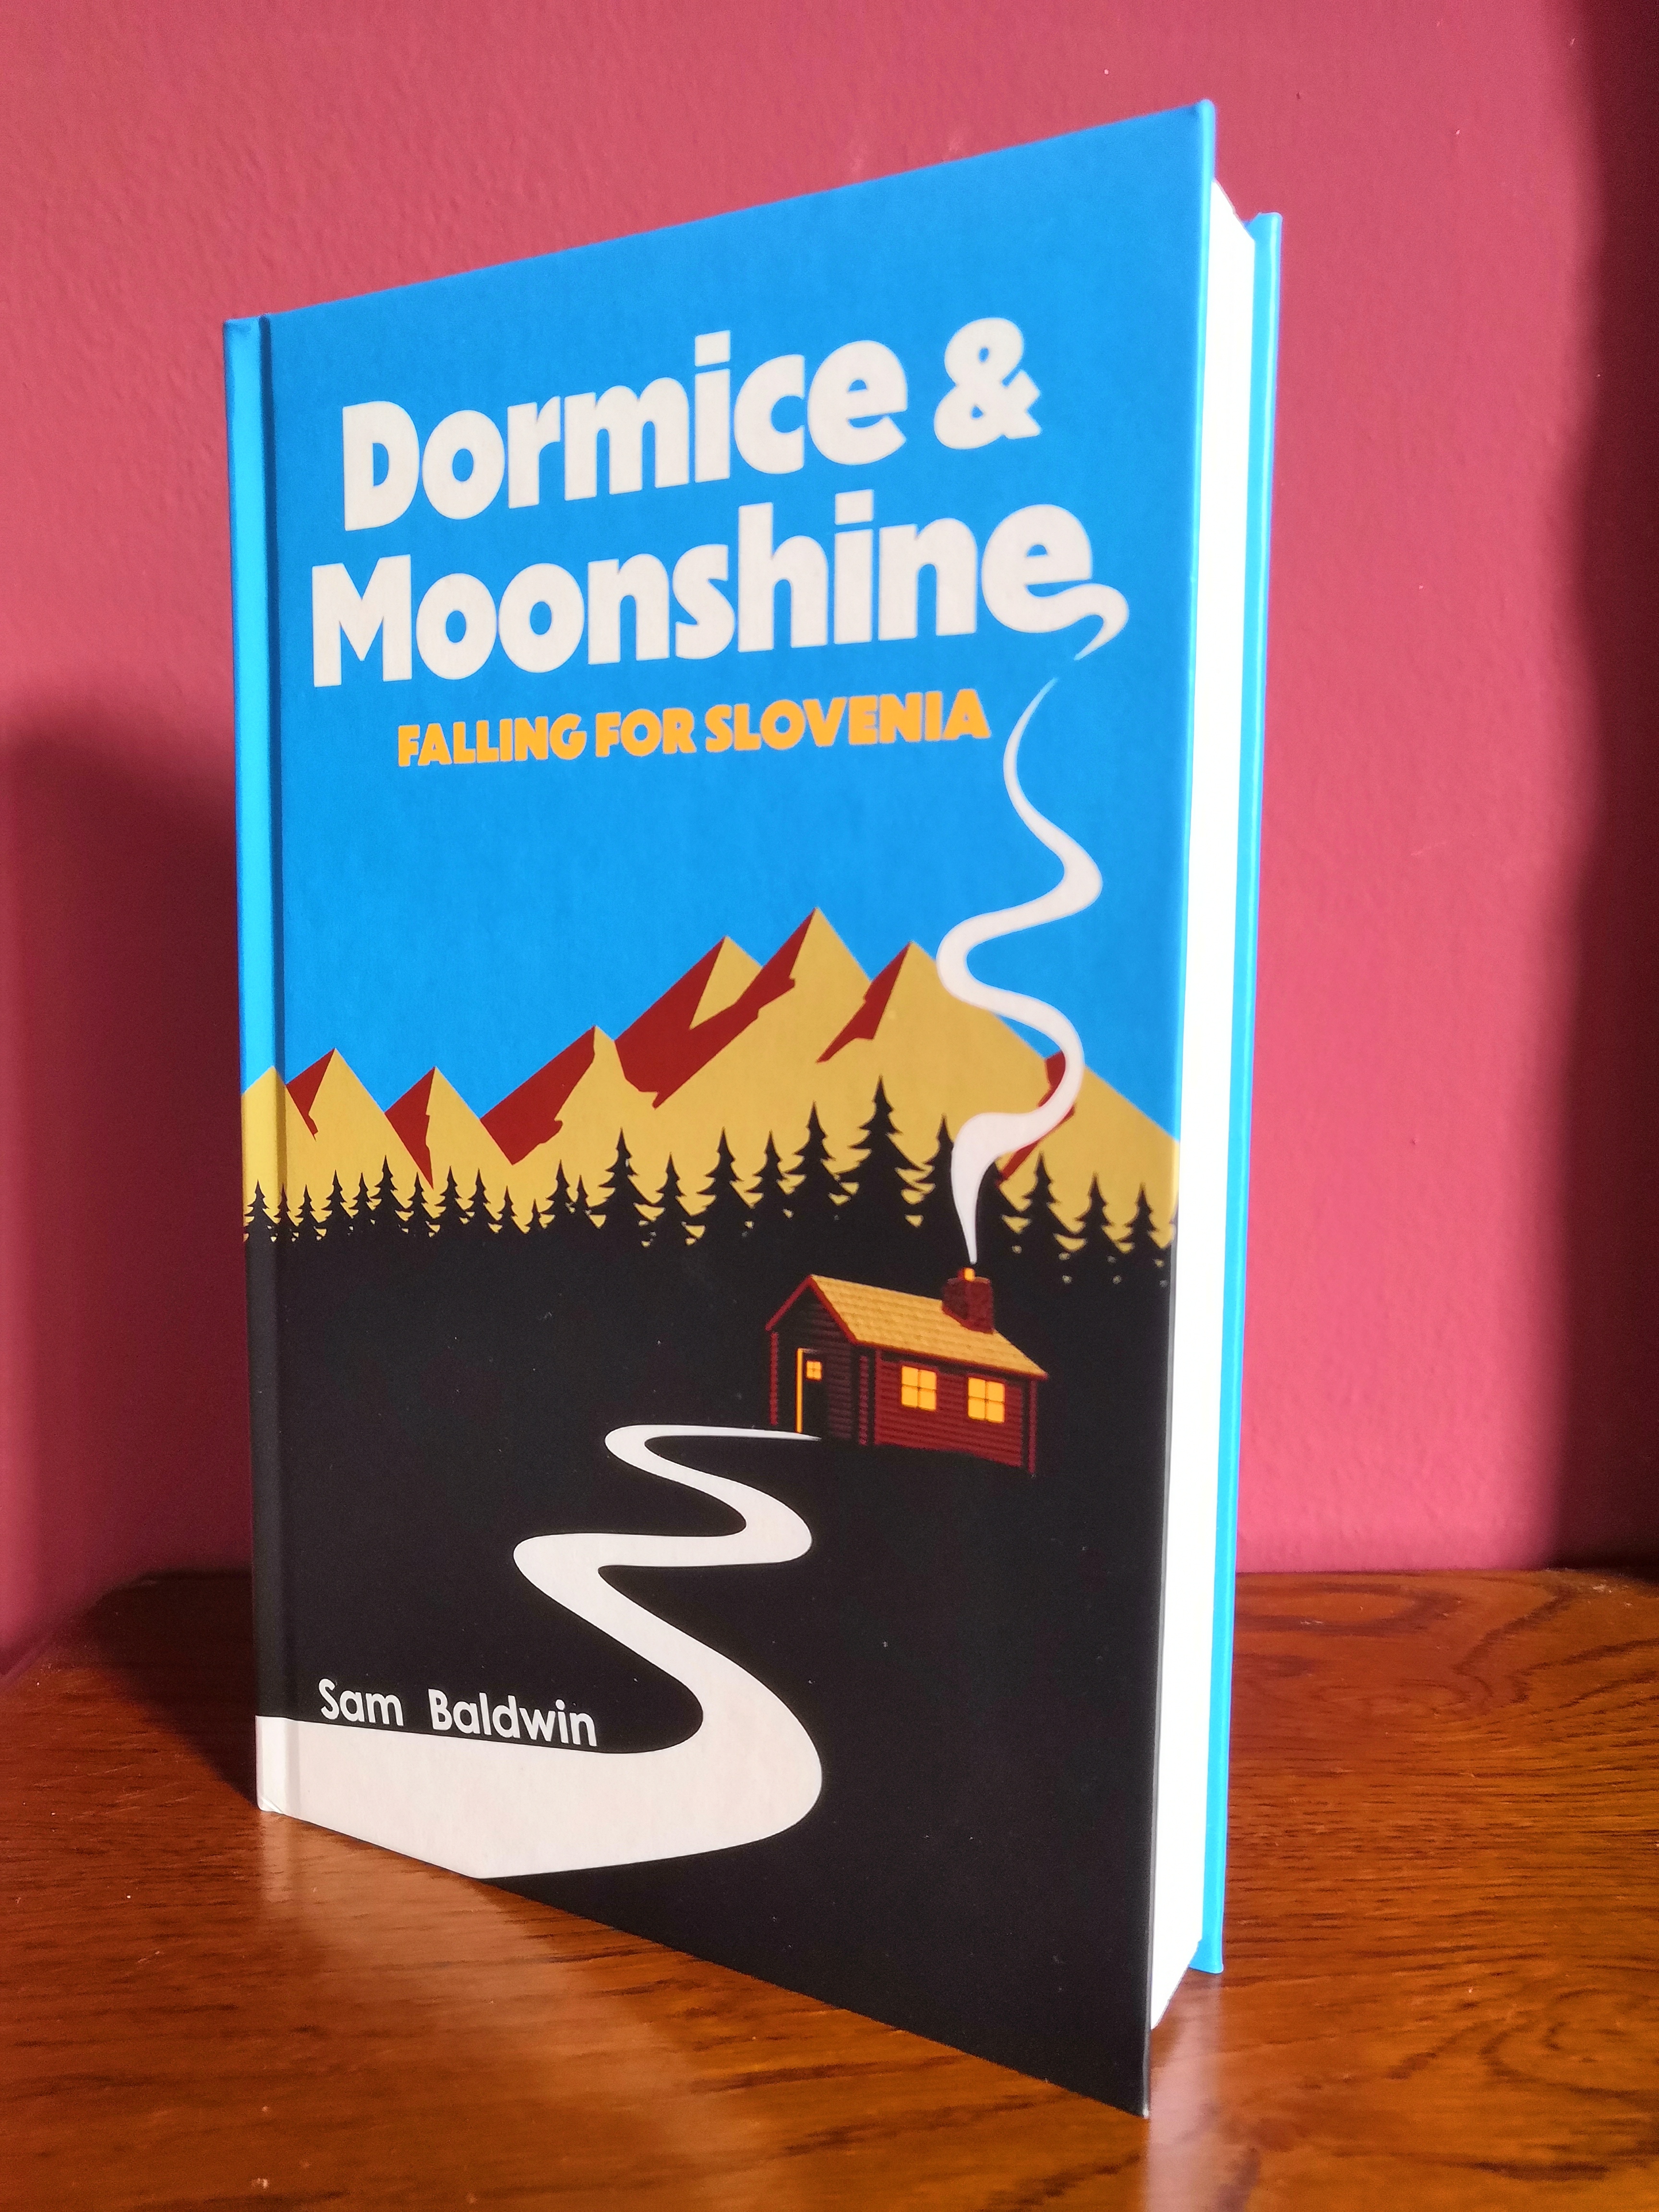
If you’d like to hear more about the trials and tribulations of restoring a 300-year-old former sausage curing cabin on the side of a Slovenian mountain, you can read the full story in my second book: Dormice & Moonshine: Falling for Slovenia – available from Amazon now.


A labour of love! It has barely rained for weeks in my area of the UK. As has often been the case in Slovenia when snow has been needed, we now seem in the UK to get too much rain or for a lengthy period, barely any at all. Regards.
Thanks Charile – a labour of love indeed. I now await the rain for full testing!
This is grand architectural legacy work. Well done! I own a 170-yr.-old czech farmstead in Iowa. Recently refurbishing the old summer kitchen (free-standing bldg. used for cooking in the summer to avoid heating up the main house). It still had the orig. wooden gutter attached when we moved in 20 some yrs ago. I stored it back then and, amazingly, remembered where I put it. Patched & painted it and will re-install. It still has 2 of the orig. iron, drive-in brackets. I may use your technique of fashioning wooden brackets to replace the missing iron ones. Again, great post and keep up the good work.
Hi Christian – thank you for your kind words. The gutters are still holding – so it seems the wooden brackets work if you can find the right piece of tree. There’s obviously a lot of strength in a natural crook where a branch joins the trunk. Good luck with your own architectural legacy work!